


Introduction
Working on a project that involves rendering images dynamically like user-specific images might require you, the developer, to have a way to store these images somewhere and render them when needed. In this article, I will be breaking down how to process uploaded images and store them as url strings alongside other data in a database.
Tools
For the purpose of this tutorial, we will be building a simple form component using React and interacting with our backend built with Express which then will in turn store our data in Firebase's Cloud Firestore. We will also be using the Multer package on the backend to access files from the request as well as Cloudinary for storing the actual images and getting their urls.
Note: This tutorial assumes you have fundamental knowledge of
ReactandExpress. Also, you'll be required to create a free Cloudinary account as well as a Firebase account to get started.
Setting up Firestore
- Visit firebase.google.com to set up an account
- Navigate to the console by clicking "Go to Console" on the navbar.
- Add a project and by clicking "Add project"
- On the side bar, under the Build category, click Firestore Database and create a database in test mode (just for the purpose of this tutorial).
- Select a location and click enable to create the database.
Setting up Cloudinary
- Visit cloudinary.com to create an account. It's just as easy as that
Getting Started
Let's make a folder for our project and in this folder, we will create separate folders for our frontend and server. We'll then open this folder in our code editor (VSCode is my favorite editor, and that's what I'll be using here. You can use any IDE of your choice)
mkdir image-uploader

cd image-uploader

mkdir frontend && mkdir server

code .
Building our Form Component
Let's navigate into our frontend folder, create a react app and start our app.
cd frontend

npx create-react-app .

yarn start
Now, we'll build a simple form with a text input field, a file upload field and a submit button. Paste the code below into your App.js and your App.css files respectively (overwrite the existing content in both files) or you could build and style your own form component as you wish.
import './App.css';

function App() {
  return (
    <div className="App">
      <form>
        <input type="text" placeholder="Enter your name"/>
        <input type="file" multiple />
        <input type="submit" value="Submit" />
      </form>
    </div>
  );
}

export default App;
.App{
  display: flex;
  align-items: center;
  justify-content: center;
  height: 100vh;

}

.App form{
  width: 300px;
  height: 200px;
  display: flex;
  flex-direction: column;
  align-items: center;
  justify-content: space-between;
  padding: 50px;
  border-radius: 20px;
  box-shadow: 0 0 10px rgba(0, 0, 0, 0.1)
}

.App form input{
  width: 100%;
  font-size: 1.1rem;
}

.App form input[type="submit"]{
  background: #111;
  color: #fff;
  font-size: 1rem;
  height: 40px;
  font-weight: bold
}
.App form input[type="submit"]:hover{
background: #000;
cursor: pointer;
}
.App form input[type="text"]{
  font-size: 1rem;
  padding: 10px;
  border: 2px solid rgba(0, 0, 0, 0.3)
}
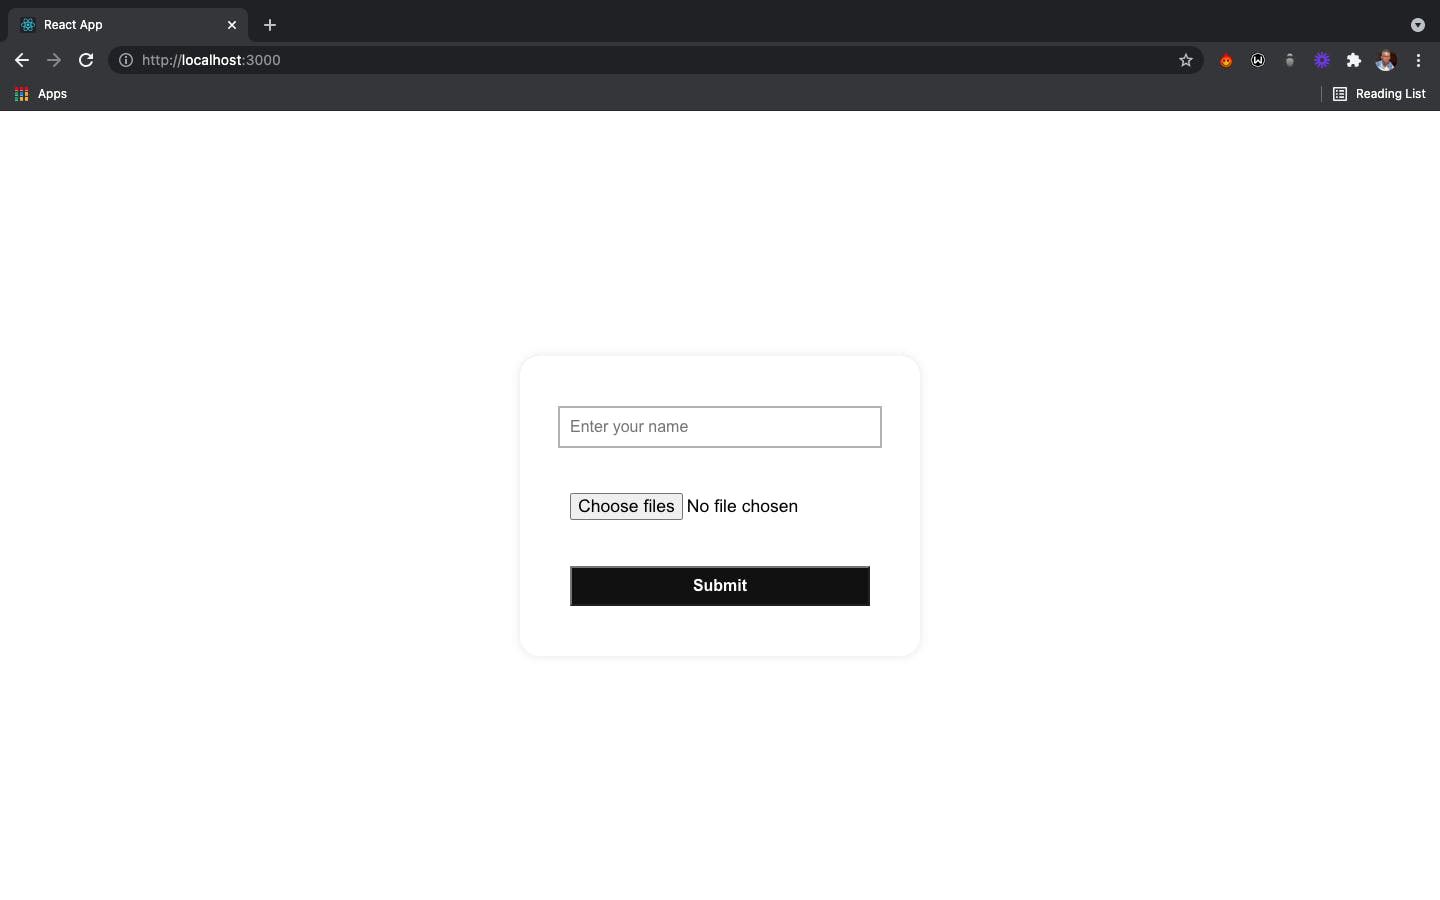
Here's what my form looks like. Now that we have our form ready, let's implement a simple logic to handle the text and file inputs.
We'll create two state variables using the React useState hook ( both for the text and file upload fields ) and initialize each as an empty string and empty array respectively i.e:
const [name, setName] = useState("");
const [files, setFiles] = useState([]);
We will then listen to change events on their respective input field and update the state accordingly. The setName function will change the name state based on the input value of the text field while the setFiles function will change the files state based on uploaded files. Note that files will be an array of all our uploaded images files.
Our App function should now be looking like this
function App() {
  const [name, setName] = useState("");
  const [files, setFiles] = useState([]);

  return (
    <div className="App">
      <form>
        <input
          type="text"
          placeholder="Enter your name"
          value={name}
          onChange={(e) => setName(e.target.value)}
        />
        <input
          type="file"
          multiple
          onChange={(e) => setFiles(e.target.files)}
        />
        <input type="submit" value="Submit" />
      </form>
    </div>
  );
}
Note: The
multipleprop in the file input tag indicates that we're at liberty to upload more than one file at once.
Submitting the Form
Here, we'll be creating a handleSubmit function that'll handle the submission of our form to the backend. To do this, we need to first extract these data and convert them into what is called FormData.
FormDatais a javascript class object which allows us to handle literally form data ( as the name sounds ) in key-value pairs and it is majorly used when we're having to send that data to a server.
We'll be creating an instance of this FormData class in our function, appending the content of our input fields - which will be gotten from our state variables - using the append method. This append method basically takes two arguments (it can actually take up to 3, the third being the filename, which we don't need, and is optional.) which are the key and values. If the key doesn't already exist, it creates a new key in the FormData object, otherwise, it appends the value to the existing key. You can read more about FormData here
To implement this, let's create a variable named formData and make it an instance of FormData. We'll then go ahead to loop through our files state array and append each image there to the form data, giving them all a key of files ( you could name this anyhow you like ).
Note:
formDatais our created variable named in camelCasing whileFormDatais the constructor from which we instantiatedformData.
function App() {
  const [name, setName] = useState("");
  const [files, setFiles] = useState([]);

  const handleSubmit = (e) => {
    e.preventDefault(); // To prevent the submit button from refreshing the page
    const formData = new FormData() //Create an instance of FormData

    // Loop through the files array and append to formData
    for(let i = 0; i < files.length; i++){
      formData.append("files", files[i]);
    }
    // Append name input to formData
    formData.append("name", name)
    console.log("Images are", formData.getAll("files"))
    console.log("name is", formData.get("name"))
  }
  return (
    <div className="App">
      {/* attach the above function to listen to our form submit event */}
      <form onSubmit ={handleSubmit}>
  // ...rest of our code
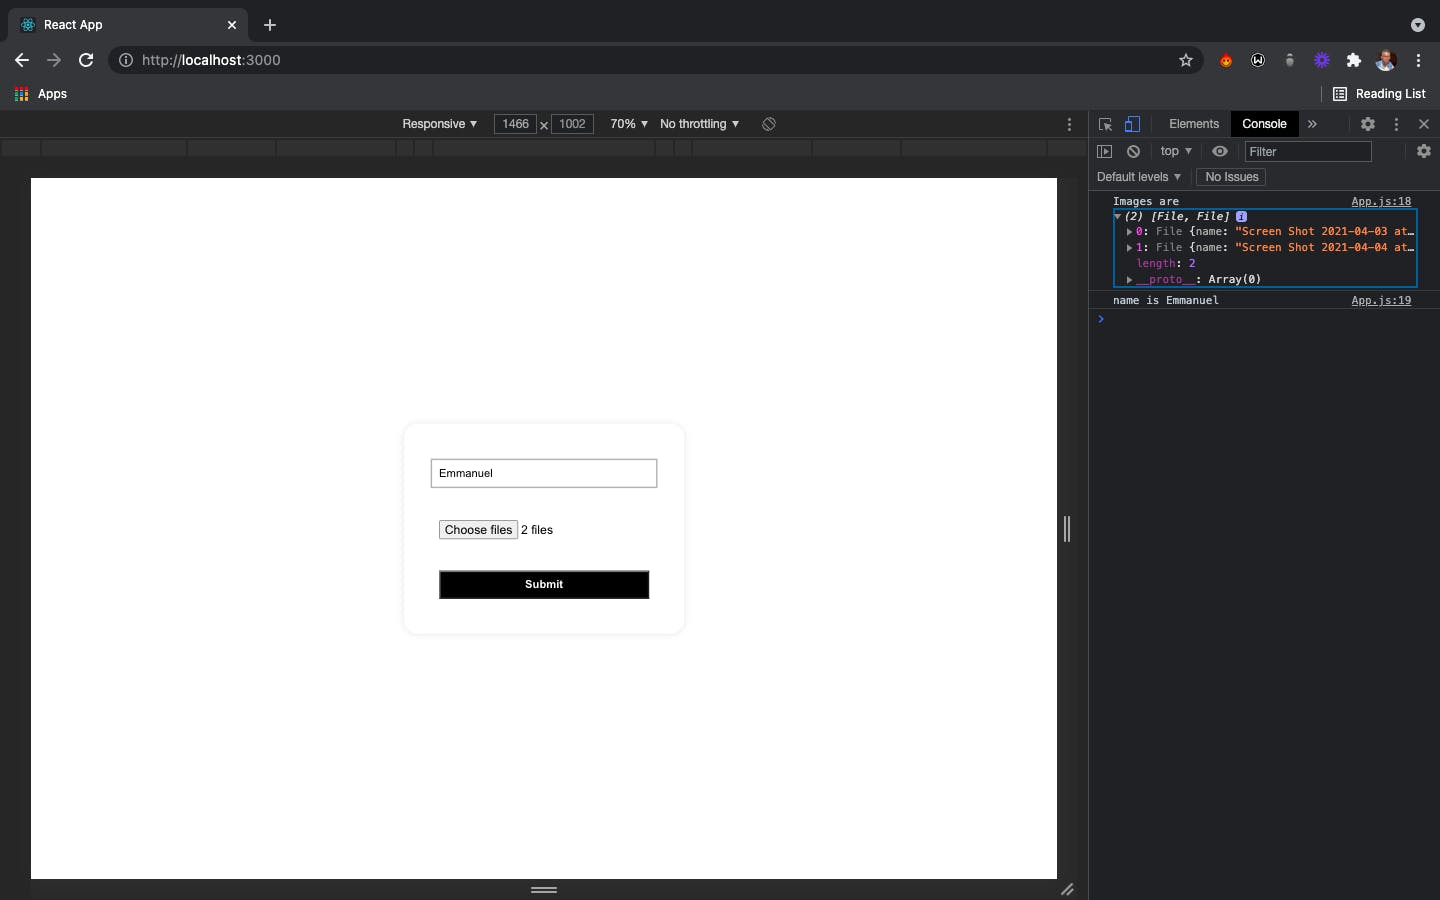
Now we can easily make a post request to our database, passing this formData object into our request body and leaving our backend to handle the rest but since we've not implemented our server yet, we'll be logging the fields in our formData object to the console using the get() and getAll() methods.
The
get()method returns the first value associated with a given key while thegetAll()method returns an array of all associated values.*
Let's upload sample images and click on the submit button to see this in action. We should see our formData object fields logged to the console like this:
Now that we've sucessfully extracted the content of our input fields and they are ready to be sent to the backend, it's time to set up our backend server!
Setting up Express
Let's navigate back into our server folder to set up express. For this I'll be using the express-generator which generates a ready-made template for us.
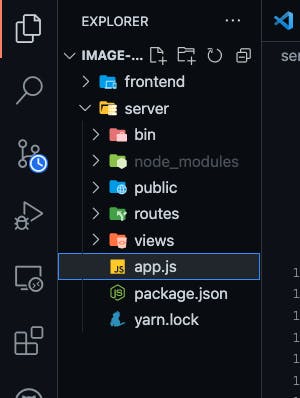
In the server folder, run npx express-generator and then run yarn or npm install afterwards to install all dependencies. Our folder structure should be looking like this
By default, servers generated by express-generator are configured to run on port 3000 but since we already have our frontend running on this port, let's change this. Navigate to the www file in the bin folder, locate where the port variable was initialized ( It should be either line 14 or 15 ) and change the port number to a number of your choice. I'll use 5000. Also, I'll add a callback function to line 28 which will log something to the console once the server starts running. These implementations can be found in the image below

Now, let's install a couple of packages that'll be useful for us in this project. Paste the following command in your terminal
yarn add nodemon multer firebase cloudinary dotenv
nodemon: Helps to automatically restart our server each time a file is changed. Add"dev": "nodemon ./bin/www"to "scripts" in your package.json and runyarn devornpm devto start your server with nodemon.multer: This is a library that acts as a middleware in our server which makes it easy for us to access form data coming from requests.firebase: For communicating with our Firebase Cloud Firestorecloudinary: This allows us communicate with cloudinary uploaderdotenv: This is a module that loads environment variables from a .env file into process.env.
Firebase Configuration
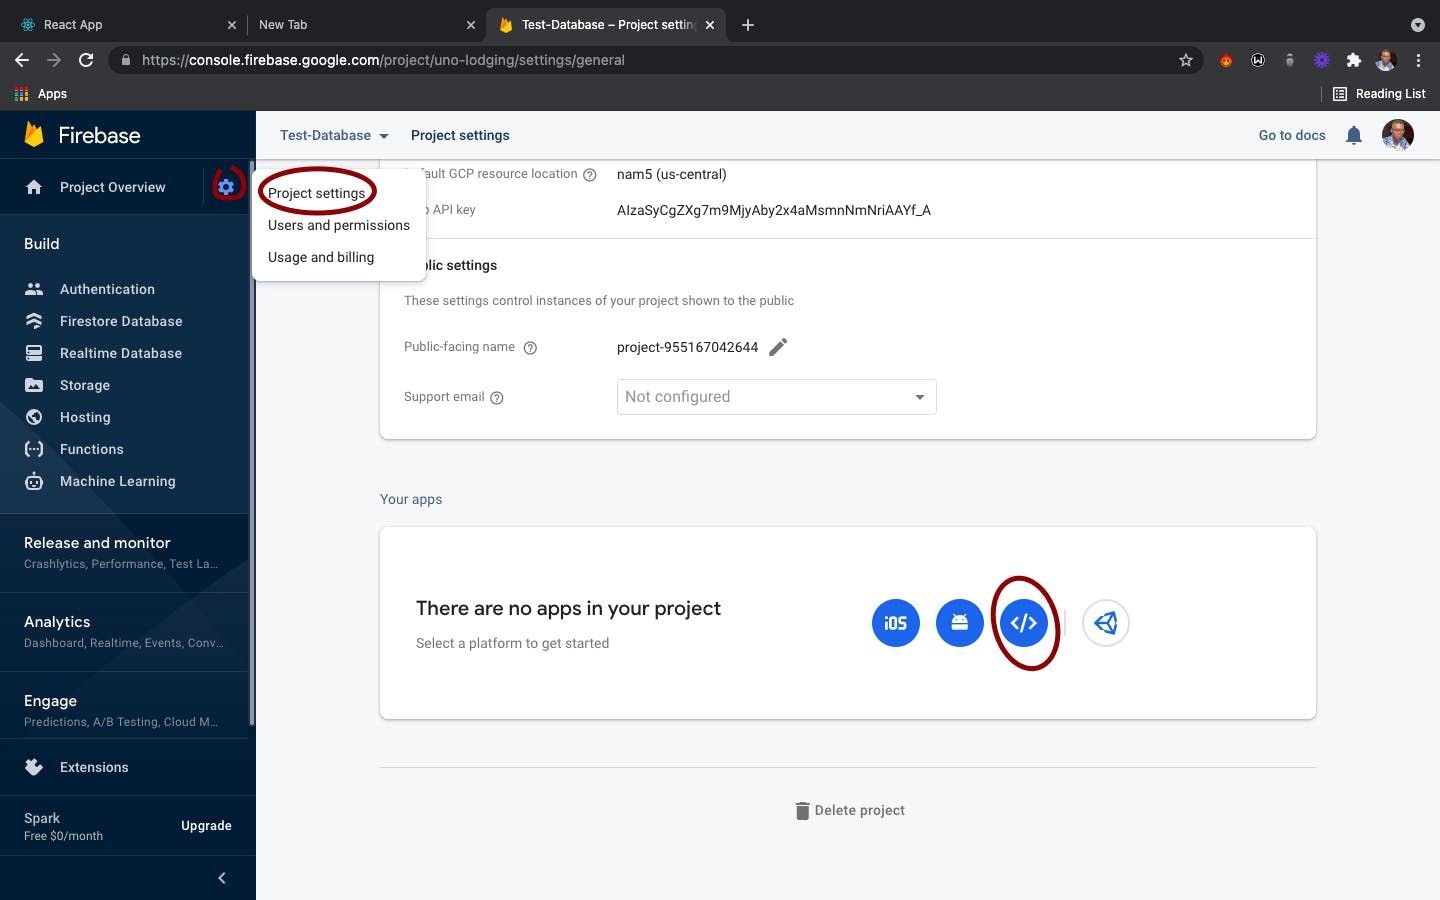
We'll set up a config file to enable us initialize Cloud Firestore with proper credentials in our environment. First, navigate to your project settings on the firebase console, scroll to the bottom and create a web-app as shown below. This should enable you to copy the firebase configurations for your app.
Now, let's create a config folder in our folder's root. We can then create a firebase.config.js file right inside it, import firebase and then paste our copied configuration. Next, we'll go ahead to initialize firestore, all in the format shown below.
const firebase = require("firebase");

const firebaseConfig = {
    apiKey: "AIzaSyCgZxxxxx",
    authDomain: "xxx.firebaseapp.com",
    projectId: "image-uploader",
    storageBucket: "image-uploader.appspot.com",
    messagingSenderId: "9xxx7042644",
    appId: "1:955167042644:web:0f8cxxxx1",
    measurementId: "G-TMEQ0Cxxx"
  };

 const db = firebase.initializeApp(firebaseConfig).firestore();

 module.exports = db;
Note that it might be a good practice to store your keys securely e.g in environment variables.
Now that we have set up our firebase configuration, we can begin to interact with our database using this exported db variable. We will implement this in a few, but let's set up our Cloudinary configuration as well.
Cloudinary Configuration
Under the Account Details section on your Cloudinary dashboard, you will see some variables. These are what we'll use in setting up our Cloudinary configuration. To protect these information, we will be storing them in our environment variable. Let's create a .env file in our folder's root and store our Cloud Name, API key and API Secret. Those are the three values we'll be needing.
Our .env file should be looking like this
API_KEY=xxxxxxx
API_SECRET=xxxxxxx
CLOUD_NAME=xxxxxx
Next, let's create a cloudinary.config.js file in our config folder and paste the following code:
const cloudinary = require("cloudinary").v2;

// require and configure dotenv
require('dotenv').config();

cloudinary.config({
    cloud_name: process.env.CLOUD_NAME,
    api_key: process.env.API_KEY,
    api_secret: process.env.API_SECRET
});

module.exports = cloudinary
Setting up Multer
Still in our config folder, lets create a multer.config.js file and paste the following code:
const multer = require("multer");

const upload = multer({
  storage: multer.diskStorage({}),
  limits: { fileSize: 10000 },

  fileFilter: (req, file, cb) => {
    // The function should call `cb` with a boolean
    // to indicate if the file should be accepted
    if (!file.mimetype.match(/png||jpeg||jpg||gif$i/)) {
      cb(new Error("Invalid image format!"));
      return;
    }
    // We pass in true to cb as such if the file
    // makes it to this point in order to accept it
    cb(null, true);
  },
}).array("files", 5);

module.exports = upload;
In this file, we are configuring multer, setting the limit, specifying the file extensions we want, the form in which our files will be received i.e in form of an array, and also specifying the maximum number of files as well as the name of the files we are expecting (remember we named the images field "files" in our formData). I'm setting this to accept a maximum of 5. You can read more on configuring multer with express on the official express docs.
Setting up our Route
First let's delete the users route file since it won't be needed. We'll be implementing our route in the index.js file. Let's also delete the usersRoute import in our app.js. In the index.js file, we'll delete the default route set, leaving the imports and export, and then we can import all we need and define our route properly.
The Imports
We'll import all our config files by pasting the following lines of code at the top of our file
const db = require("../config/firebase")
const cloudinary = require("../config/cloudinary");
const multerUpload = require("../config/multer")
The Route
Let's set up a route that accepts a post request to "/api/upload" and pass in the multerUpload we imported from our multer.config.js file as a middleware. This middleware now allows us to have access to req.files which will contain our uploaded image files. Every other data sent from our frontend that isn't a file will still remain in the request body. Let's extract these file and non-file data and store them in variabes named files and body respectively and then handle the file upload to Cloudinary subsequently.
To do this, we will map through files containing our file objects ( each having a "path" property ) and send each file path to Cloudinary which will return an object containing the "url" property. This url is what we need, hence we'll store the array of urls our map function returns in a constant. This operation is asynchronous, hence this array will be an array of promises which we can later resolve to get the actual urls. We can then go ahead and store this array of urls in our database. Enough talk, let's implement this.
const express = require('express');
const router = express.Router();
const db = require("../config/firebase.config")
const cloudinary = require("../config/cloudinary.config");
const multerUpload = require("../config/multer.config")
router.post("/api/upload", multerUpload, async (req, res) => {
  const files = req.files;
  const body = req.body;
  try{
    //Map through files and upload to cloudinary
    const urlPromises = files.map(async file => {
      const result = await cloudinary.uploader.upload(file.path);
      // You can log result to your console to
      // see all it returns. We only need the url, hence
      // we're extracting it alone.
      return result.url
    })
    //Resolve the array of promises and store in a constant.
    //This array will be an array of urls
    const imageUrls = await Promise.all(urlPromises)
    //add the data to firebase using the imported db
    //The following code will create a users document and add
    //the incoming data to it
    const data = {name: body.name, images: imageUrls}
    db.collection("users").add(data)
    .then(resp => res.status(201).json({message: "Upload successful", data}))
    .catch(err => res.status(400).json({status: error, message: err.message}))
  }catch(e){
    res.status(400).send( e.message)
  }

})

module.exports = router;
Note: You might have to implement a check to be certain your files array isn't empty before trying to map through it. e.g
if ( files && files.length > 0 ) // rest of the code
Yipee! We're done implementing our route. This endpoint will return a json object which contains a message and the uploaded data if it's successful otherwise it'll return an error status.
Now let's go back to our frontend folder and make use of this endpoint to send our data.
Before we continue with our half-done handleSubmit function, let's run yarn add axios or npm install axios to install the axios library in the frontend folder which we'll be using to make http requests.
We can now go ahead to remove the console.logs, import axios at the top of the file and then implement the following code responsible for making a post request to our server.
const handleSubmit = (e) => {
   // ... previously implemented code

    axios
      .post("http://localhost:5000/api/upload", formData, {
        headers: { "Content-Type": "multipart/form-data" },
      })
      .then((res) => console.log(res.data))
      .catch((err) => console.log(err));
 }
The first argument in the post method above is the url on which our server is being run, the second being the formData object we appended files and name to and the third being the options within which we are specifying our headers.
On submission of our form, the handleSubmit function should now log a json object which contains a message, and data which is the formData we posted, as sent back by our server if we have successfully uploaded our form data, otherwise it'll log the specified error message from the backend. We can try this out by uploading some images.
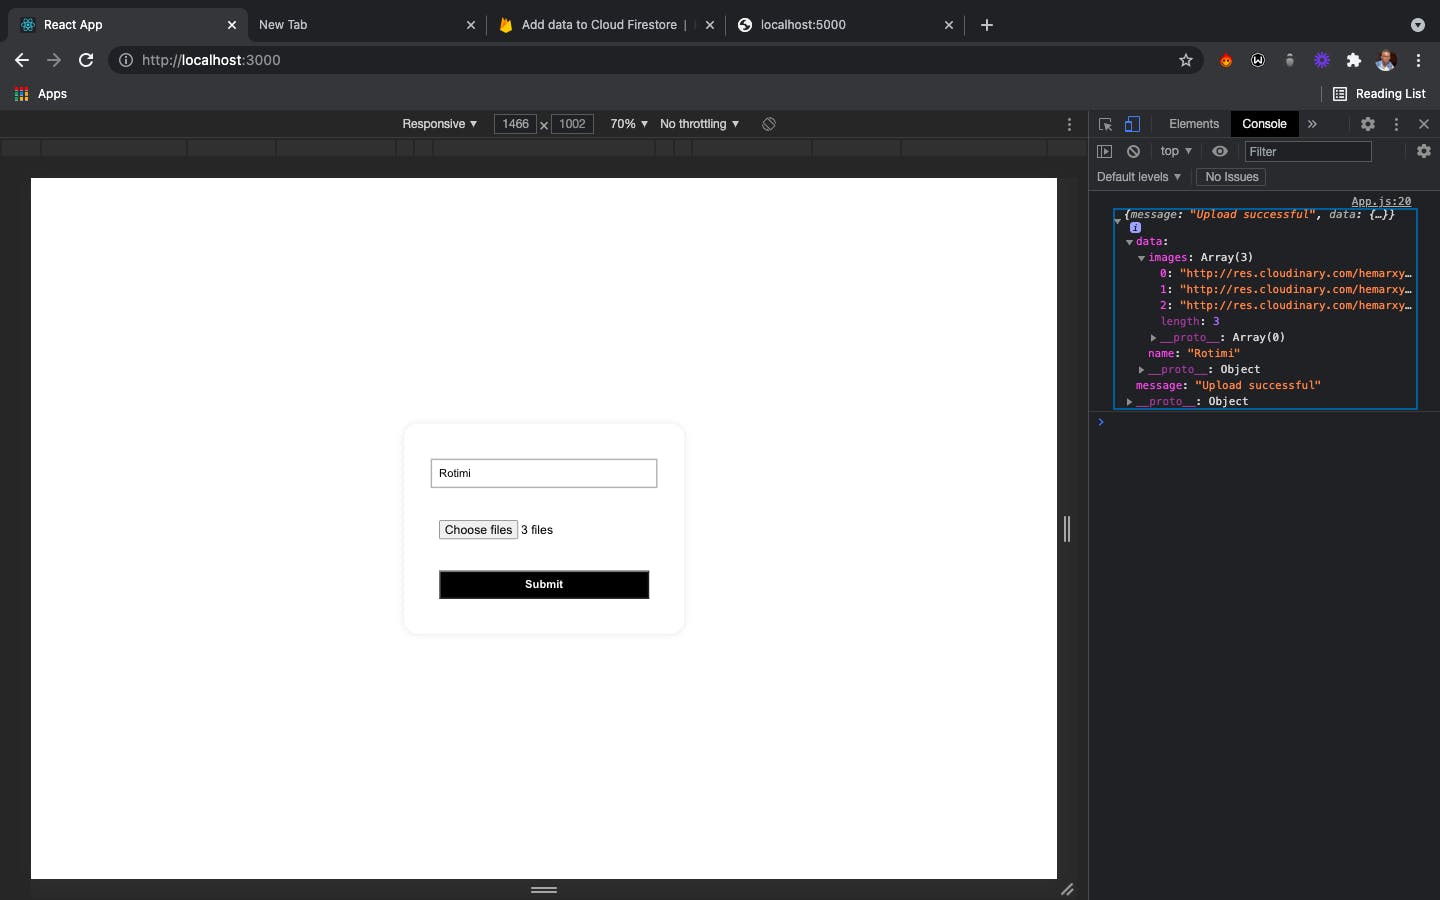
The above image shows our data was successfully uploaded. We can also confirm this by checking our firestore database. We should have a "users" collection which contains the data we sent. It'll appear like this:

Conclusion
We have successfully implemented a way to send form-data from our frontend to a database as url through our backend. This implementation might come in handy in scenarios where you need to save images that will later be rendered on the client side. You can easily map the array containing the urls and render the images passing the url as a value to the src attribute.
This has been a long read, and if you made it here, then I sincerely hope you find it helpful. You might also want to check out the entire code repository on github .
Thank you for your time!